
I’ve recently gotten my hands on a lasercutter, and I’m having a ton of fun with it. As I’m being creative again, I decided to start sharing my works here once more.
Not all the designs will be done by me. I will always always tell what parts are homemade and what isn’t. That being said, here is my first design, completely homemade in this case.
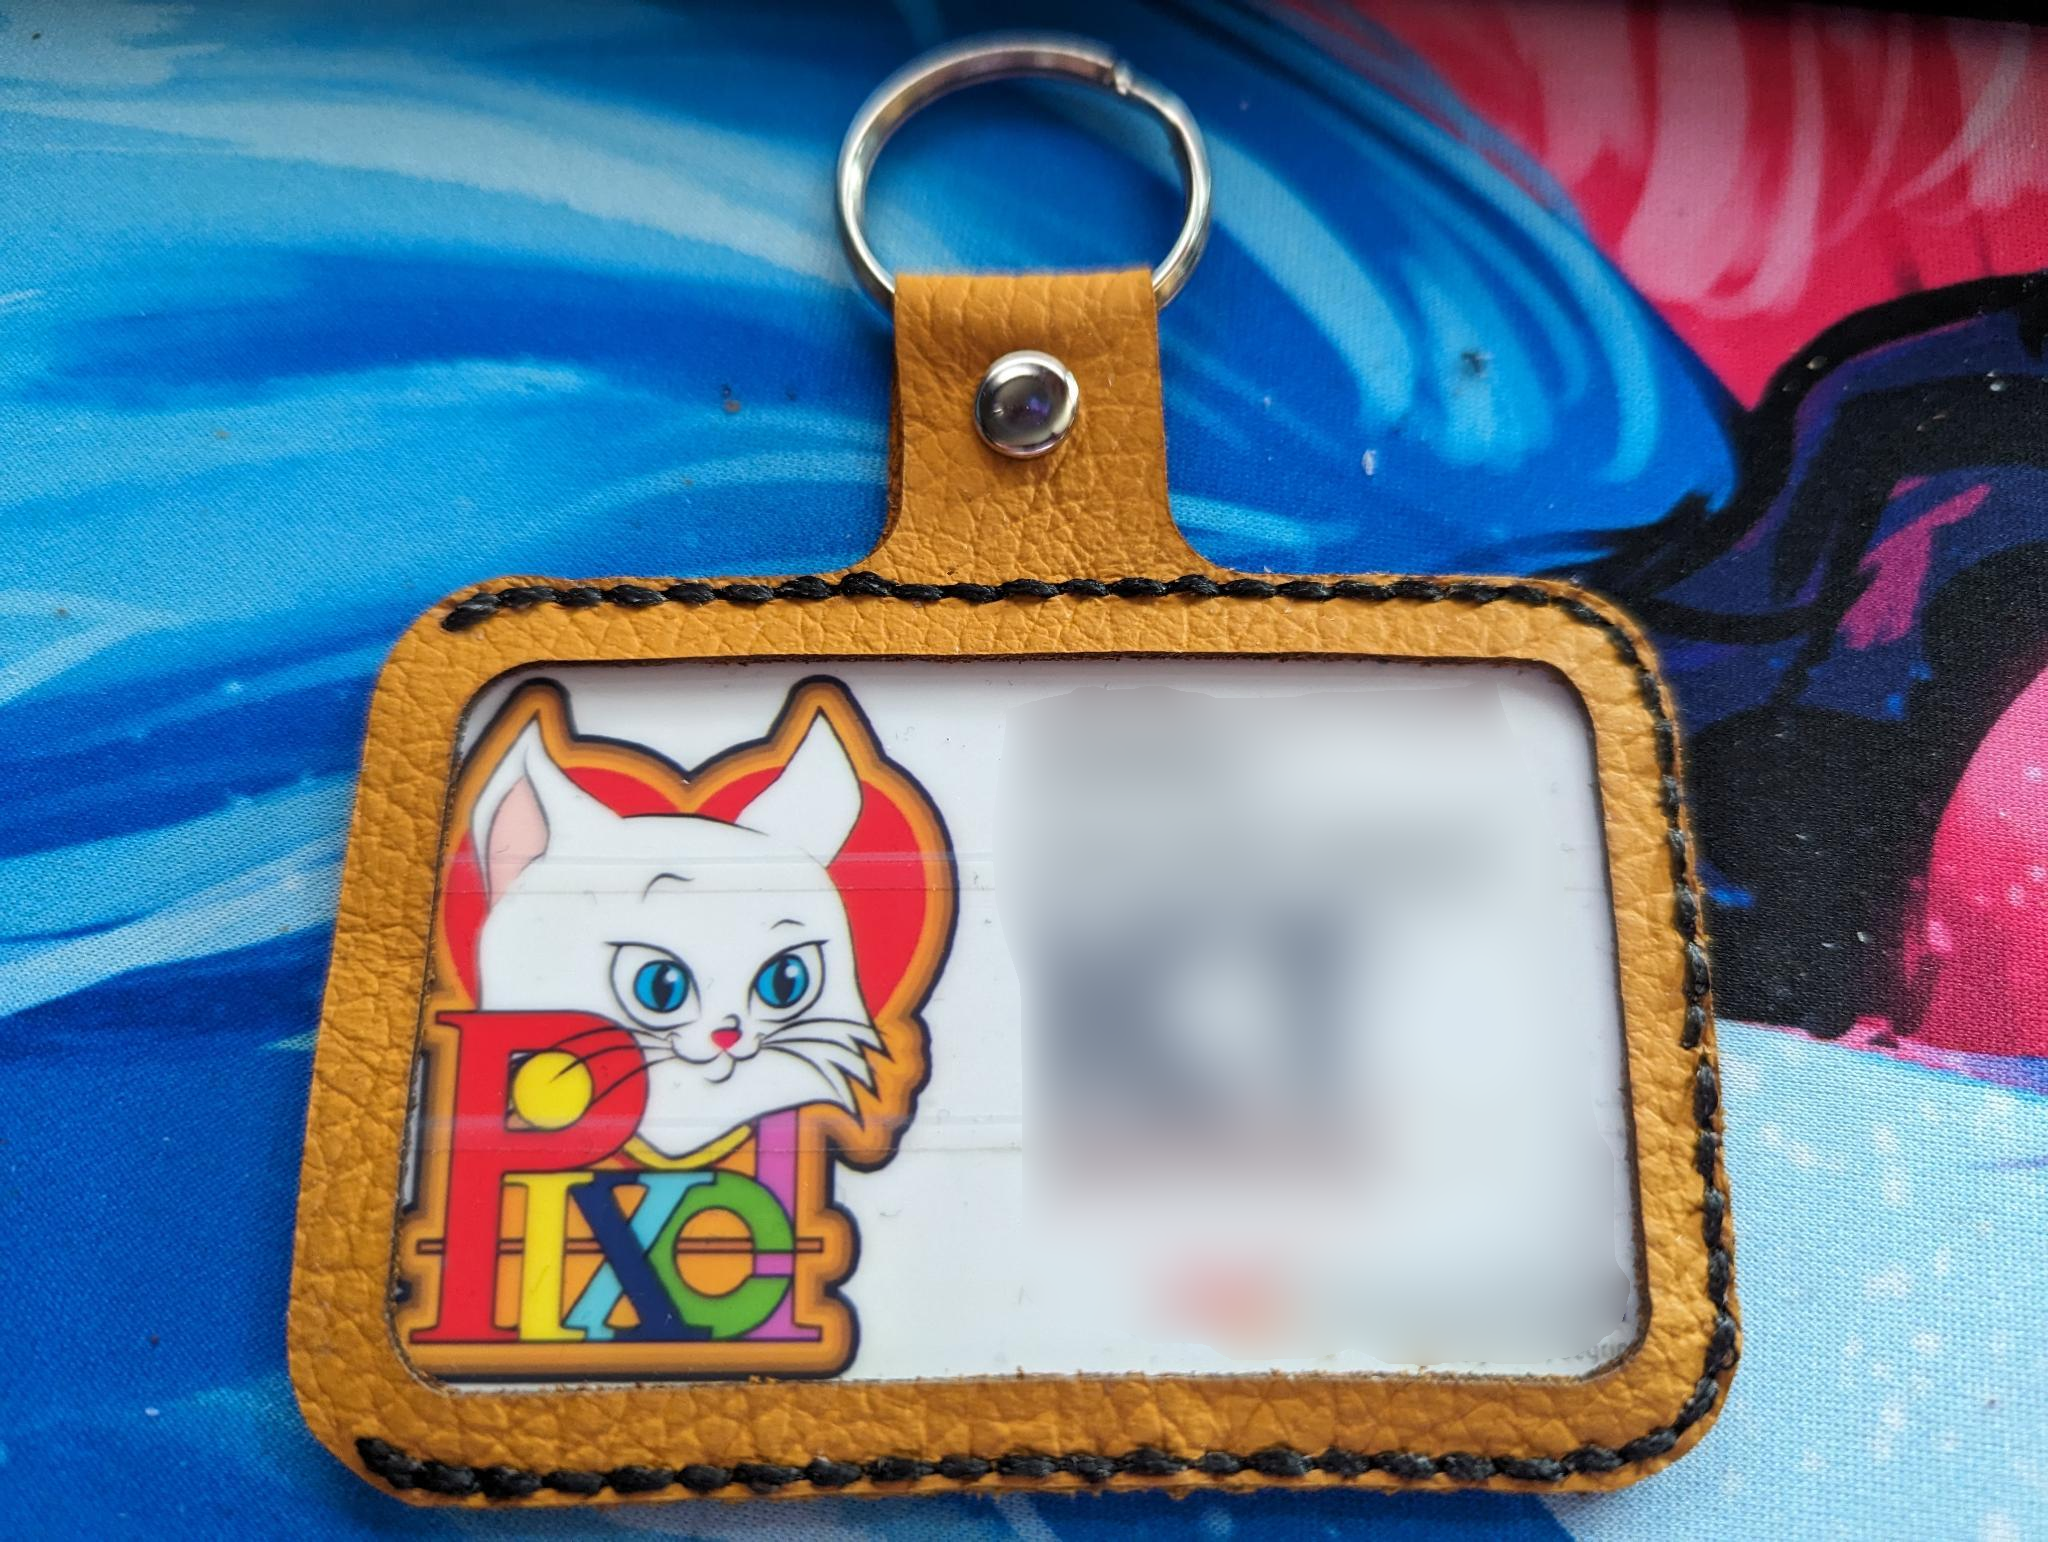
This one was fun, its my 2nd attempt at working with leather. The first attempt was the same passholder, but I attempted to hammer in the sewing holes manually. In this version though, I used a vector dotted line, and cut the holes as well. It allowed me to get closer to the edges without fear of ripping through the leather. I used waxed thread and the saddle stitch to sew it together. The opening is just wide enough to slip a creditcard sized pass through.
The leather I used is very soft, and the pass would not stay in properly at first, so i took a sheet of transparent plastic, and glued that in place. If you do it this way, do remember to use sandpaper on the edges, so the glue will stick better. In the futured though, i will lasercut the plastic, with sewing holes as well, and just stitch it in between the two layers.
The “color”layers of the logo on the back could be a little more defined, a little but more of a difference in the colors, but its good enough, it still looks rather nice i think.
If you want to use this design, you can download the cvg file here

One Response to Skillup: Laser cutting 101